[updated on Apr 12, 2024] Have you upgraded from Windows or macOS to Ubuntu and missing MS Paint or Preview to reduce the size of the images? Then you are in the right spot! In this article, you will see how to resize Images in Ubuntu for free and easily!
By reducing image size you gain two things. First, the image size (as in pixels) gets smaller so you can use it on social platforms or even articles or blogs. And secondly, the size (as in storage) also decreases so it will make the web page load faster. So 2 problems get solved.
If MS Paint was a thing on Ubuntu then this article would have made no sense. Since I went through this I know how frustrating it can get. It is so silly but it hurts when you download apps thinking it will work but they require some amount of terminal coding.
But today, I am sharing with you, a method that requires no strings of code to run! Also, I assure you this is the most detailed article about how to resize images in Ubuntu! So without anything else, let’s get started!
Using GNU 2.10 to Resize Image in Ubuntu
To resize images in Ubuntu for free you need GNU Image Manipulation Tool. It is also known as GIMP. It’s not a sponsored article whatsoever, I use it daily. The images used below are from the exact sample!
GNU Image Manipulation tool 2.10 is free to download. It’s a great application. I’ve been using it for a while before sharing it with you. So you can be completely safe and download it.
To download GNU 2.10, search it on Ubuntu Software Center. It’s a 400 MB application.
It is a powerful photo editing application, image resizing is just some little work! You can say it’s an “alternative” to Photoshop in a broader sense. GIMP is an open-source photo editor that’s available on Ubuntu (Linux), Windows, and macOS.
I am dividing the steps to resize images as pre-and-post. Pre as the name applies will tell you step by steel to successfully resize a file. And in the post, how to export the sample file. So let’s begin with the pre.
Steps to successfully Resize The Image Size (Pre)
Once the GNU Image Manipulation Program is open, follow a few steps.
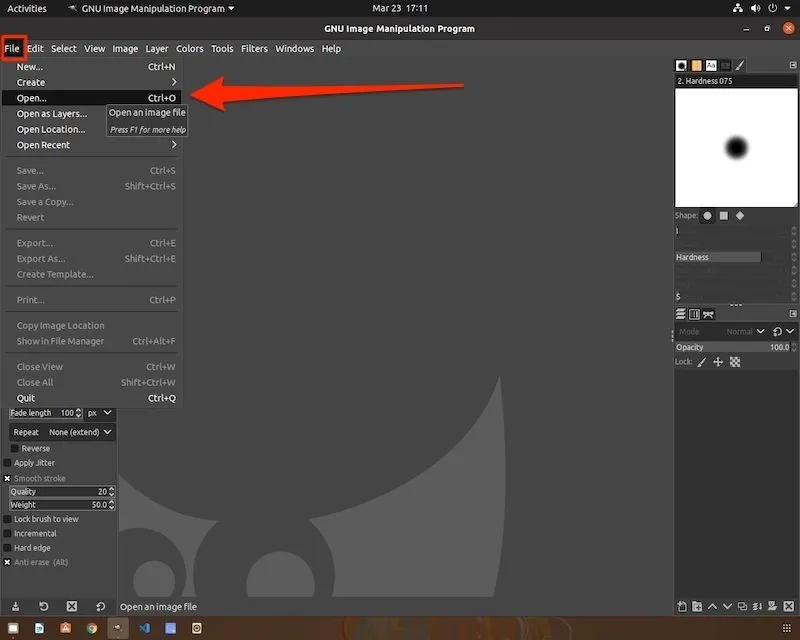
#1 Click on File and press Open. You can alternatively do that with Ctrl+O.
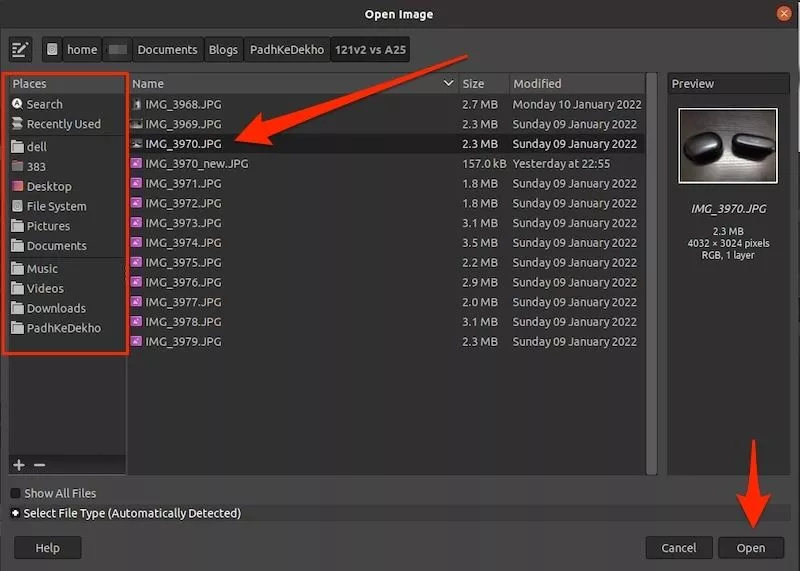
#2 Navigate to the file from the Places section and click Open.
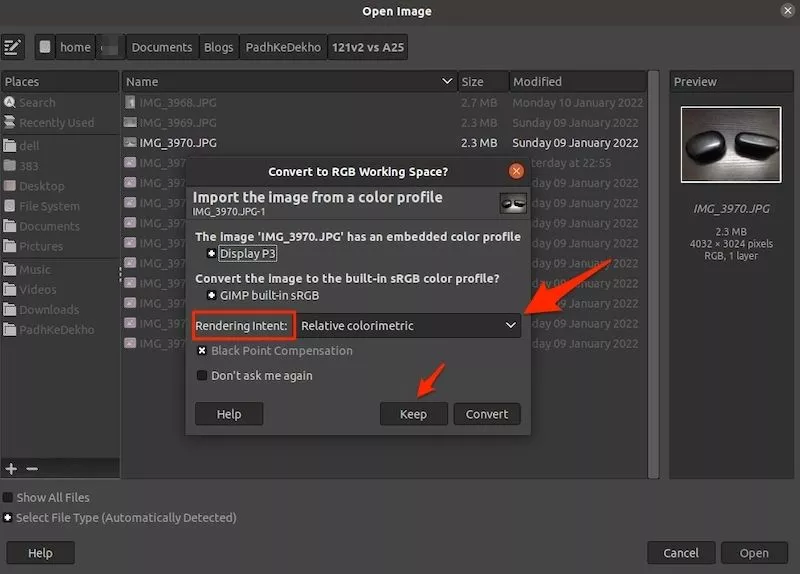
#3 GNU will ask for Convert to RGB Working Space? You can either choose Rendering Intent with Perceptual, Relative colorimetric, Absolute colorimetric, or Saturation. if you like the colors of the original image, then press the Keep button on the bottom.
#4 The original photo will be shown to you. To resize the photo click on the Image tab and select Scale Image.
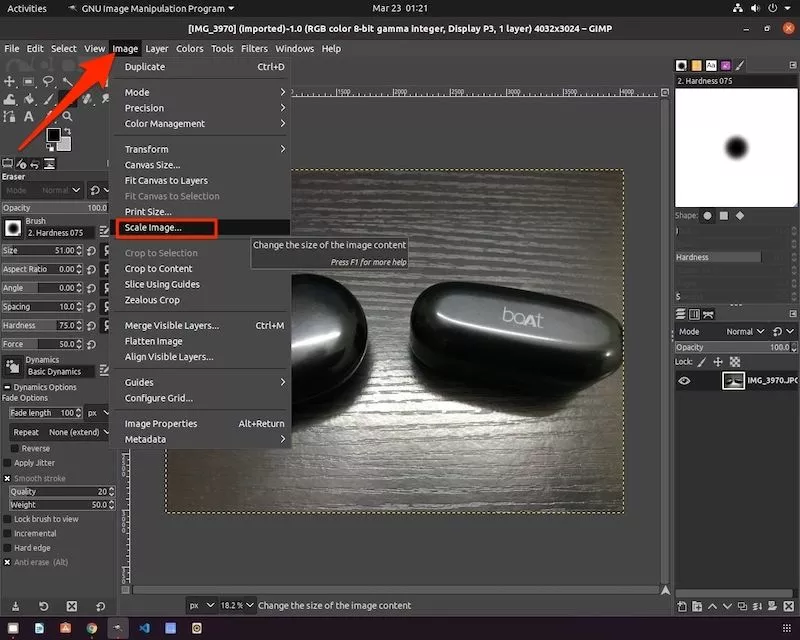
#5 Press the Scale Image. if you plan to upload these images on your website then stick to the px marked in yellow below. For websites, the ideal image can be up to 800 px width in the landscape. Always remember that the lower image px means lesser image size.

The height will be automatically adjusted for a perfect aspect ratio. In the same way, if the image is portrait then lowering the height should be preferred. For height, I usually pick 300 or a max of 400 px. Rest you can try and explore!
Once you have selected the px value (either width or height) press the px button next to it so that the other unchanged value gets in the proper aspect ratio. Usually with 800px width height is 600.
#6 Now you will have a tiny preview of the image. Don’t worry this is not the final size! Change the value from 25 to 100 percent pointed with a green pointer.

Steps to Successfully Export The Resized Image (Post)
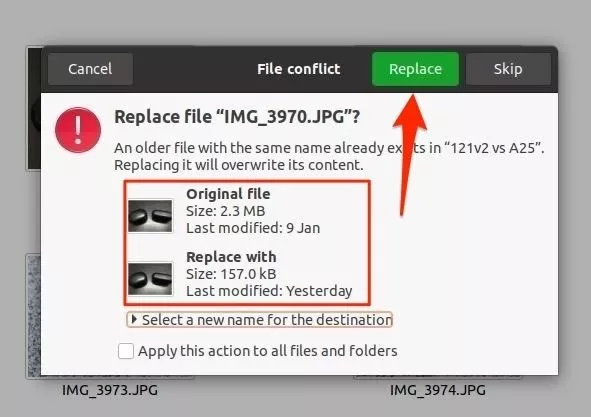
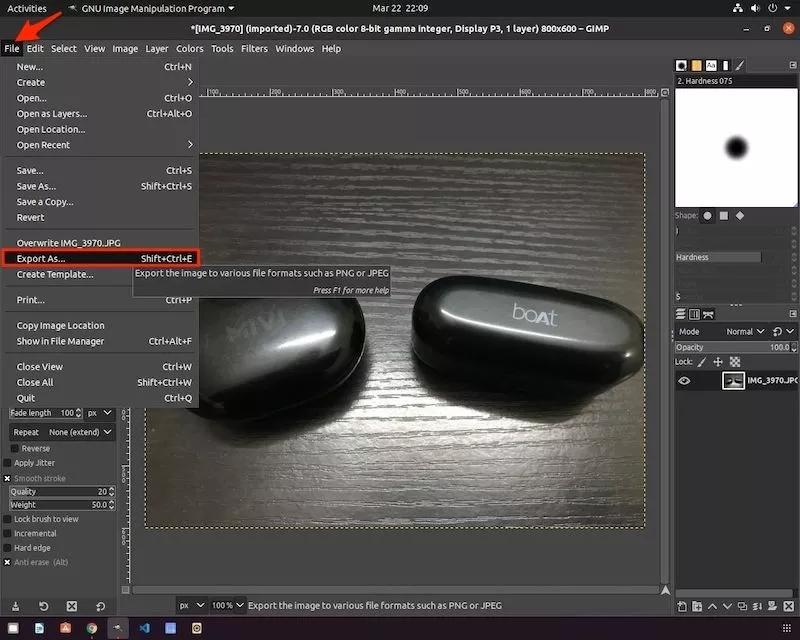
#7 Congratulations, 80% work is done just exporting is left! For that press the File tab and press Export As… Give the file a name or leave it as is and replace it with a bigger one if you don’t wish to use it as the original size and click export.
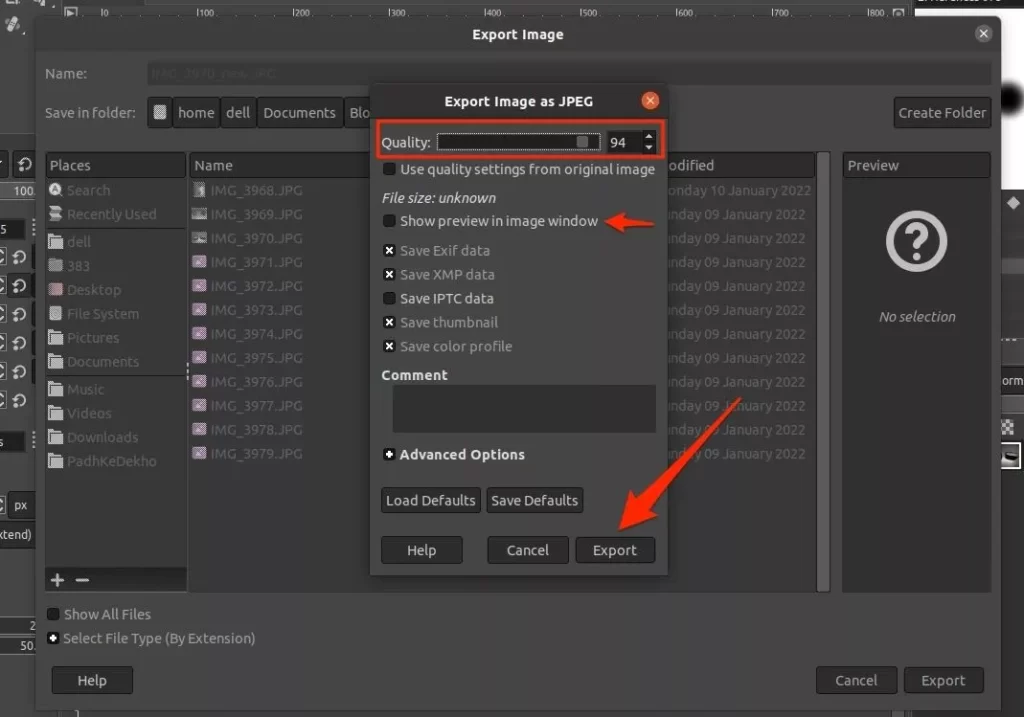
#8 You can make a few changes if you want to play around with the settings. Using the first, Quality tab you can lower the image size, etc. And the moment you will click the Export button you will have the exported file in the desired location.
Wrapping up!
if you have followed all the 8 steps above, then nothing can go wrong but still, if you face any issues then I am just a ping away on the social accounts below.
As the above tutorial is for GNU 2.10 then the process may get changed in the future if it does then bookmark this page so that you know how to resize an image on Ubuntu using GNU.
if the file size is still higher than you require then here is a detailed article that can cut the size by 80 percent! The steps in the article will work on Linux, Windows, and Mac too! So do give it a shot!
I hope this article will be of help! Please share with others who might find it of more help.
Padhkedekho Out!
Comments are closed.