Back in the golden era of Windows XP taking a screenshot was not easy. But now, taking a screenshot on Windows & Mac is easy and there are many default features. Moreover, MacOS gives you options to screengrab or record a video too!
So in this article, we will cover all the best and easiest system default methods to take screenshots on any laptop or PC running Windows or Mac.
Hey there! Welcome to PadhKeDekho, if you are new here, we provide interesting and helpful tips and tricks so that you take the best out of your device! So please bookmark it!

How To Take Screenshot on Windows 10 And Older
On the latest version of Windows i.e. Windows 10, you can capture screenshots in various ways. Out of all those options, we prefer only 2 methods which are entirely different from each other. Not just those work on Windows 10 but also on Windows 7, 8, and 8.1!
1: Using The Basic Screenshot Tool
Capturing every element on your laptop screen is possible with a full screenshot. Let’s say, you are working on a Word document but need to show some of the icons on the desktop, taskbar, and wallpaper.
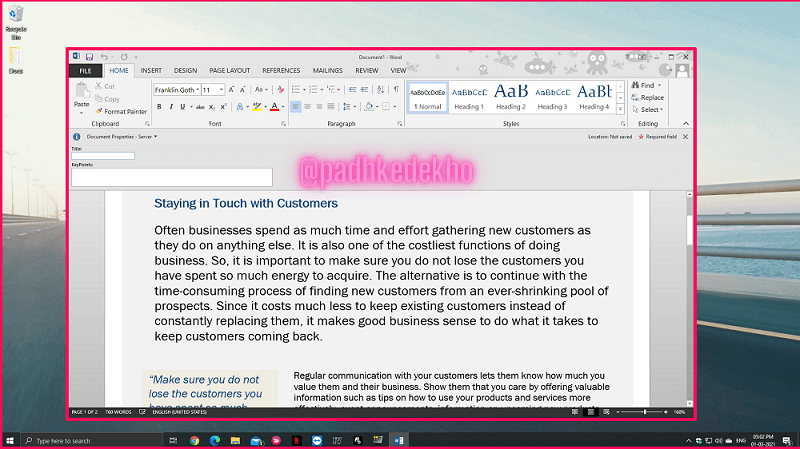
How would you take a screenshot on your machine? Different laptop manufacturers use various key combinations.
Some laptops achieve the task by pressing the Win + PrtSc (Windows key and Print Screen button). PrtSc or Print Screen is next to the Backspace button and merged in the Insert button.
By default, the screenshot in Windows is saved in the Screenshots folder under Images in Documents.
If this does not work, press the Fn + Win + PrtSc (Function or fn key + Windows Key + PrtSc/PrintScreen/Insert) key combination.
Fn is usually written in blue color, which you will find on the bottom of the keyboard near the Spacebar key.
2: Using The Snipping Tool
The next method is unique, more precise, and will work on the oldest Windows 7 so you can take screenshots on a laptop. With Snipping Tool you can select the portion of the screen you want to use.
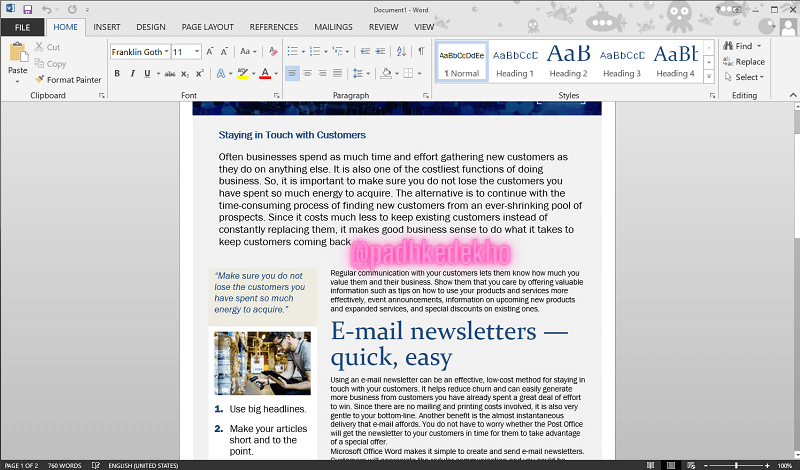
Let’s say you are working on an MS Word document but don’t want to show the taskbar, icons, or wallpaper. Then, the Snipping Tool is going to be helpful.
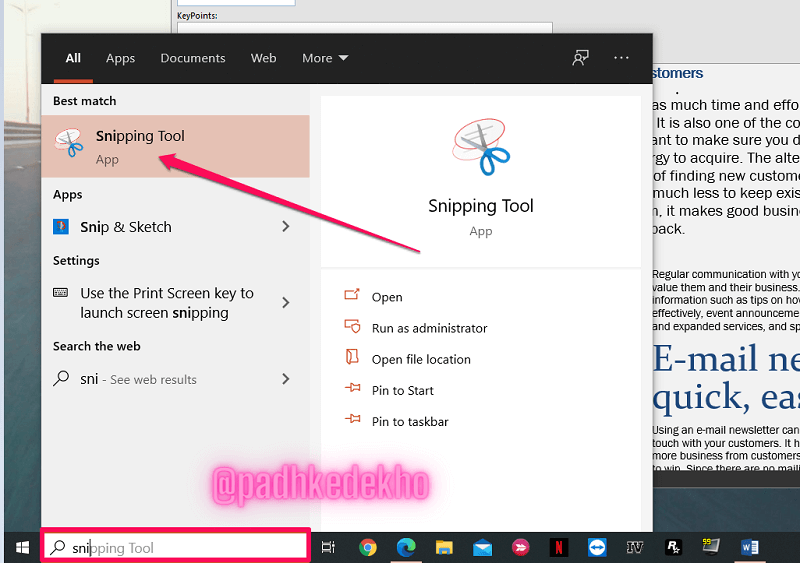
Snipping Tool is easy and quite handy. To launch Snipping Tool click on the Windows key on the keyboard or left-click on the search bar and search for Snipping Tool. Under Best Match, you will see Snipping Tool. Press the Enter key or left-click to launch it.
On Windows 7, 8, and 8.1 you can hit Win + R, and a Run dialog/create a new task box will open. Search for Snipping Tool and hit enter.
Then you’ll see multiple choices Like New, Mode, Delay, Cancel Options, etc. Under Mode, you will find numerous options like Free-form Snip, Rectangular Snip, Window Snip, and Full-screen Snip.

These are a few advanced tricks that you can use. For now, all you need is to click on the New button. Afterward, the screen will turn grey. Hold on pressing the left mouse button and select the area that you need as a screenshot.
After you have selected the area release the left mouse button. and the screenshot will pop up. Then you’ll need to give the screenshot a name and location. Within seconds, you will have your screenshot at the designated place.
So this is how you can use the Snipping Tool to take screenshots on Any laptop running Windows.
How to Take a Screenshot on a Mac
MacOS takes a screenshot differently. Moreover, it offers multiple sets of options that you can choose from depending on your needs.
If you need to take a long screenshot on Mac, you’ll need to press Shift + Command + 3 (Cmd + 3).
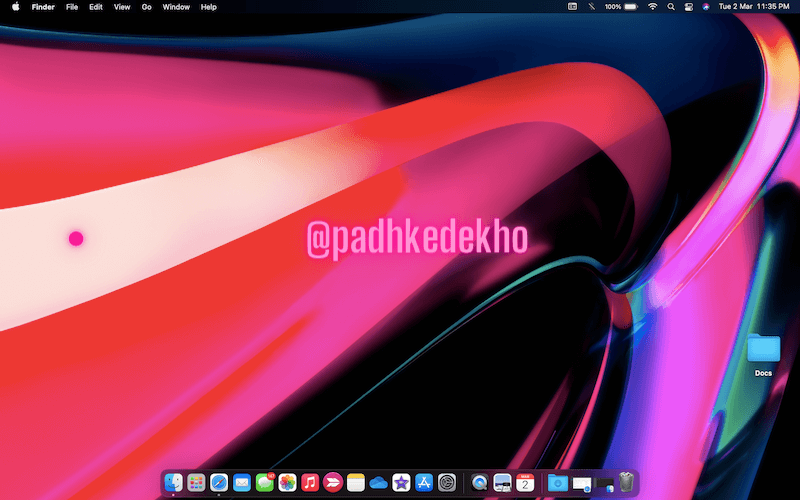
This way, you will get a complete dock, icons, apps, etc, or whatever is on the screen before hitting the key combination.
MacOS saves the screenshot on the desktop. With macOS Mojave or above you can change the default location. Like Snipping Tools on Windows, you can also screenshot a specific part of the application or software. For that press Shift +Command + 4 (cmd + 4).

After pressing the combination, your mouse pointer will show the X and Y axis on the screen near the mouse pointer. Now, drag the crosshair on the part that you need to use as a screenshot by pressing and holding a point on the trackpad.
Once you have selected the portion, leave the trackpad and you will have the desired output on the right side of the desktop.
You can enhance the screenshot-taking capabilities to the next level! Moreover, you can also record the video on the Mac screen!
By pressing the Shift + Command + 5 (cmd + 5) combination, you will see three 3 options Capture Entire Screen, Capture Selected Window, and Capture Selected Portion.
If you want to take a screenshot of the entire screen then the Capture Entire Screen option on Mac is the best choice.
Capture Selected Window will let you capture any section on the screen. By mouse hovering, some sections on the screen will grey out, and then tapping on the trackpad, the grey area will be taken as a screenshot.
Then comes capturing the Selected Portion. You can select the area as you need. Let’s say you need a screenshot with the dock & an application, Capture Selected Portion will do the trick!
So these are the ways of taking screenshots on a Mac. Of all, we tend to use Shift + Command + 5 and Shift + Command + 4 options most of the time.
Changing The Default Save Location Of Screenshot On Mac
As macOS saves screenshots and video recordings on the desktop as a result the desktop becomes untidy and unprofessional. You can rectify it by changing the default location for the screenshots and video recording.

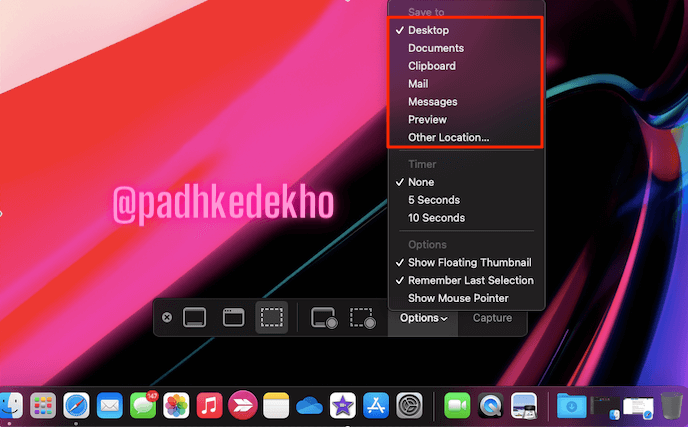
To do so, click on Options, you will see a few default locations like Documents, Clipboard, etc. If you want to save it to a different location, click Other Location… and save it there.
And that’s how you can change the default location of screenshots and videos on Mac!
Bonus Tip Especially For You!
On macOS, not only do you take screenshots but also you can record the screen without using any third-party software. How cool is that! And it is so simple and easy.
Press Shift + Command + 5 (cmd +5). Next to the screenshot options, there are two choices; Record Entire Screen and Record Selected Portion.
If you need to record the complete screen, let’s say for a “how-to” tutorial, this is the one to choose. Moreover, you can use Record Selected Portion to record a specific app or software as needed.
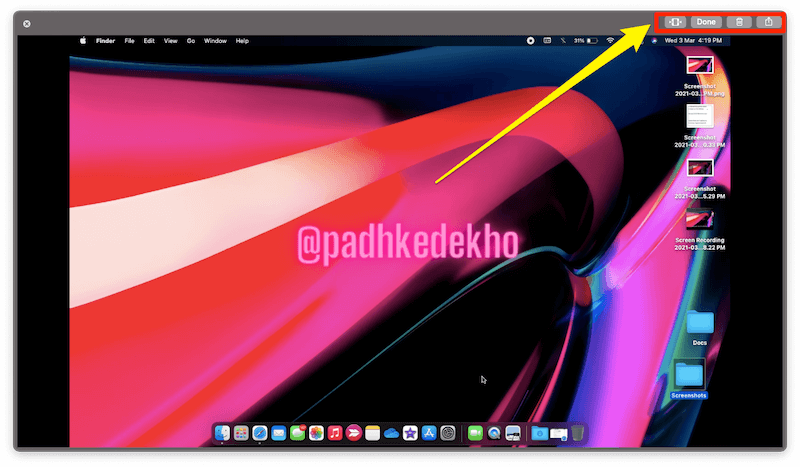
After selecting the choice, press Record next to the Options button. Now how can you stop the recording? You’ll need to press the stop icon on the top bar.

Once you are done recording, you will see a small video thumbnail on the desktop. Tapping on it will provide you some controls if you need to trim the video, press Done to save it, or if you have messed up you can press the Bin icon and delete it. Afterward, record a new one!
The best part of using this native screen recorder is that you can record your audio along with it!
That’s A Rep, Guys!
Thanks for reading! We hope you have found our most used methods to take screenshots on any laptop.
Just like the above article, we share our 2 cents in the form of reviews, tips & tricks, comparisons and opinions so do check out those articles. And if you liked the content do share it with your friends and family! Thanks, we will see you at the next one!
FAQ
How to take a screenshot on a laptop?
If you using Windows, then Win + PrtScn/Insert or Fn + Win + PrtScn/Insert will work. On Mac, You can use Shift + Command + 3. For more screenshots and shortcuts, read our article.
What is the shortcut key to take a screenshot on a Windows laptop
On Windows, you can use either Win + Insert/PrtScn or the Fn key + Win key + Insert/PrtScrn/Print Screen.
Take a Screenshot in Mac shortcut?
With Shift + Command +3, Shift + Command + 4, and Shift + Command +5 you can take different types of screenshots.
Can you take a screenshot on Macbook Air?
Yes, you can take screenshots on MacBook Air. In fact, you can take it on Any Mac device.
How to change the default screenshot location on Mac?
By pressing the Shift + Command + 5 key combination. Under Options, you can check the default location. Check our detailed article here.