Creating a custom ringtone on a Mac for your iPhone is not as easy as you think! Since you can buy ringtones from the iTunes Store, the ringtone-making process is not streamlined.
With time, you can create custom ringtones for your iPhone using iTunes and GarageBand but it’s still not that easy. So in this article, we are sharing with you the easiest method we use for making a custom ringtone on Mac for free!
If you want to see how to make a custom ringtone on Mac in action then this video will guide you!
So without anything else, welcome to PadhKeDekho, and let’s have a look at what you’ll need to make a custom ringtone On Mac for your iPhone!
Making Custom Ringtone Using Quick Ringtone Maker
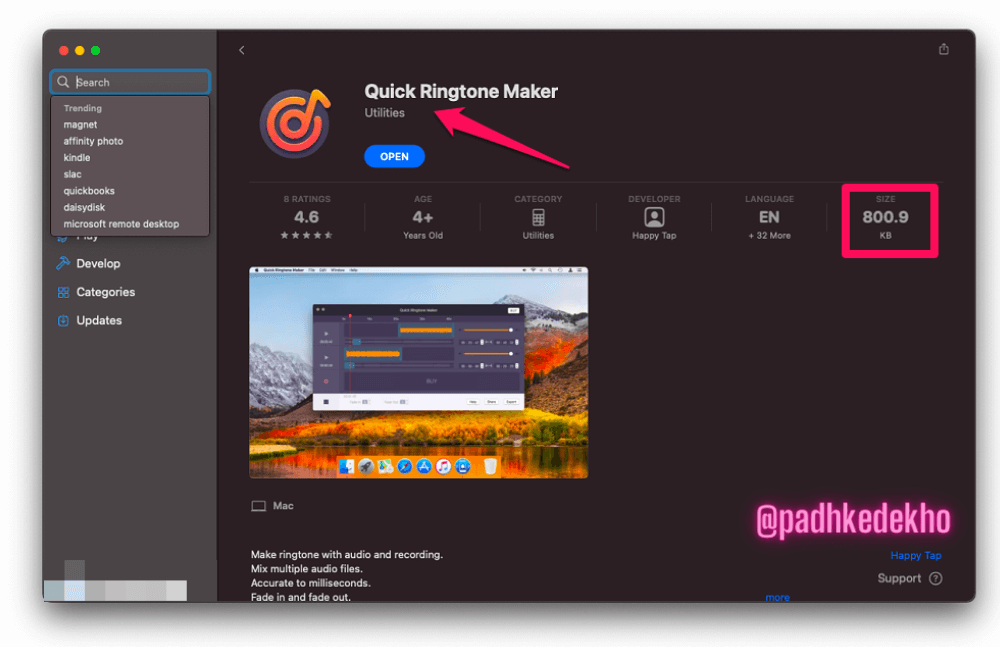
Creating a ringtone on a Mac without iTunes and GarageBand is possible with a 3rd party app. The app we are going to use is, Quick Ringtone Maker.
This free app is just 800kb and does all to create a ringtone! Moreover, it doesn’t require any signup whatsoever. With our initial testing for a week, the app has not shown a single ad or any notifications. And once you are done with it you can remove it. But trust me you will keep the app, like us!
How To Use Quick Ringtone Maker
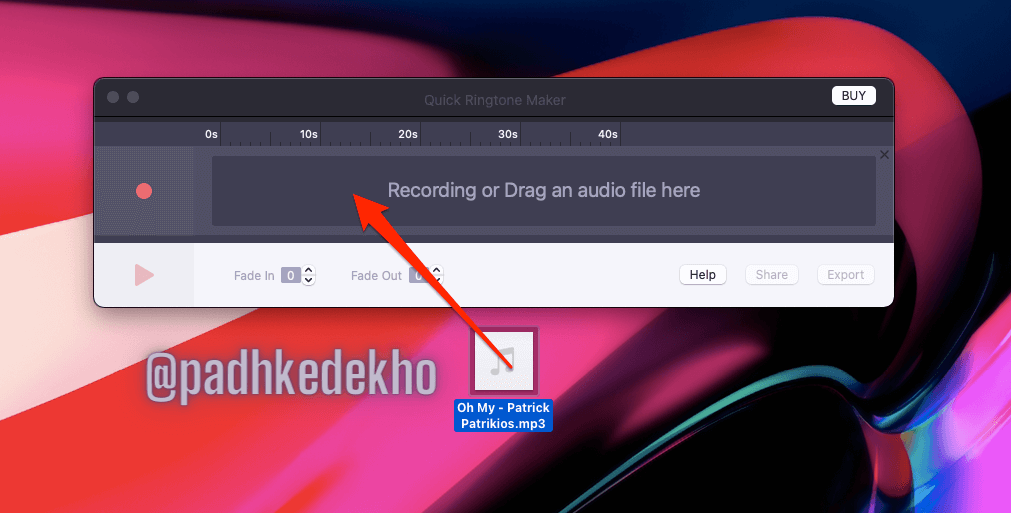
This is a very straightforward application. Once you have installed the app, launch it and you are halfway through!
Now all you need is to drag and drop the song you need as a ringtone. You can also use your recordings and create a ringtone (more about it below).
If you are subscribed to Apple Music, songs from your playlist or library can’t be used as a ringtone. For that, you need to buy the song from the iTunes store or otherwise, you need to have a .mp3 file.
Once you have arranged the song, drag and drop it on the Quick Ringtone Maker app.
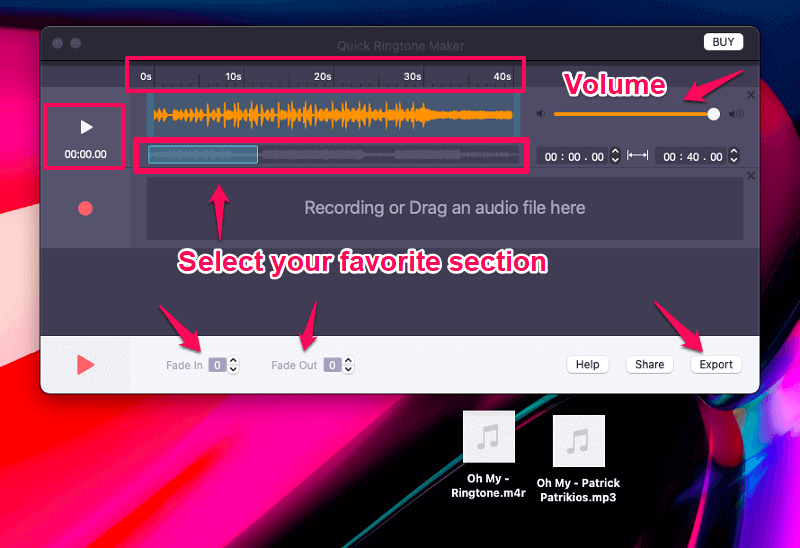
After dragging the song, you will see an advanced interface of the Quick Ringtone Maker. The first thing is the 0s to 40s timer means the ringtone cannot be more than 40 seconds. Just below it, you will see orange waveforms that represent the song.
With the help of the mouse or trackpad, you can select your favorite part by moving the small waveforms (below orange waveforms).
On the right side, you have a slider to control the volume. As per your liking, you can change it. The best part of Quick Ringtone Maker is the audio doesn’t deteriorate even if you push the ringtone volume to the maximum.
You can even customize the ringtone with the help of Fade In and Fade Out options! These are important if you need the ringtone to start slowly or end slowly.
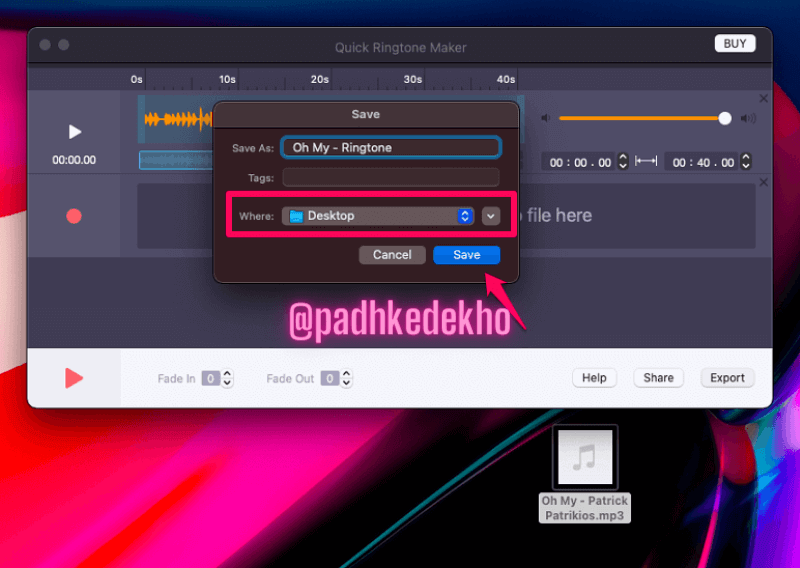
To test your creation press the play button on the top left side. Once you have customized the ringtone you can click on the Export button. You’ll need to give it a name and location.
Once everything is set, hit Save and within seconds the ringtone with <songname.m4r> will be available at the designated location.
How To Import Ringtone To iPhone Without Using iTunes
If you do not want to use iTunes or GarageBand, drag-and-drop works. For that, you have to connect your iPhone via lightning cable, USB-C, or WIFI so that you can see your iPhone under the Locations tab in the Finder’s window.
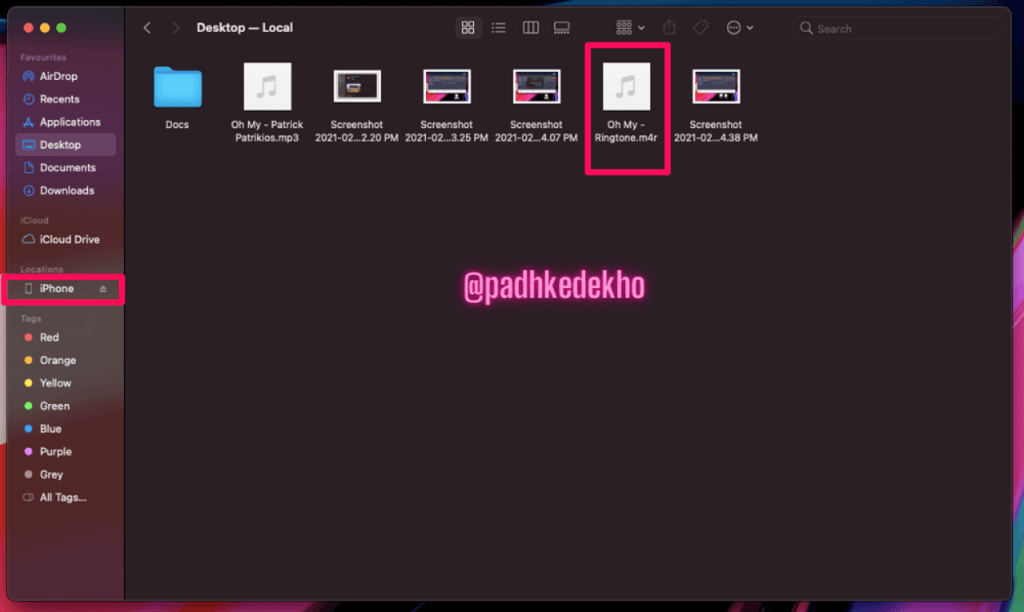
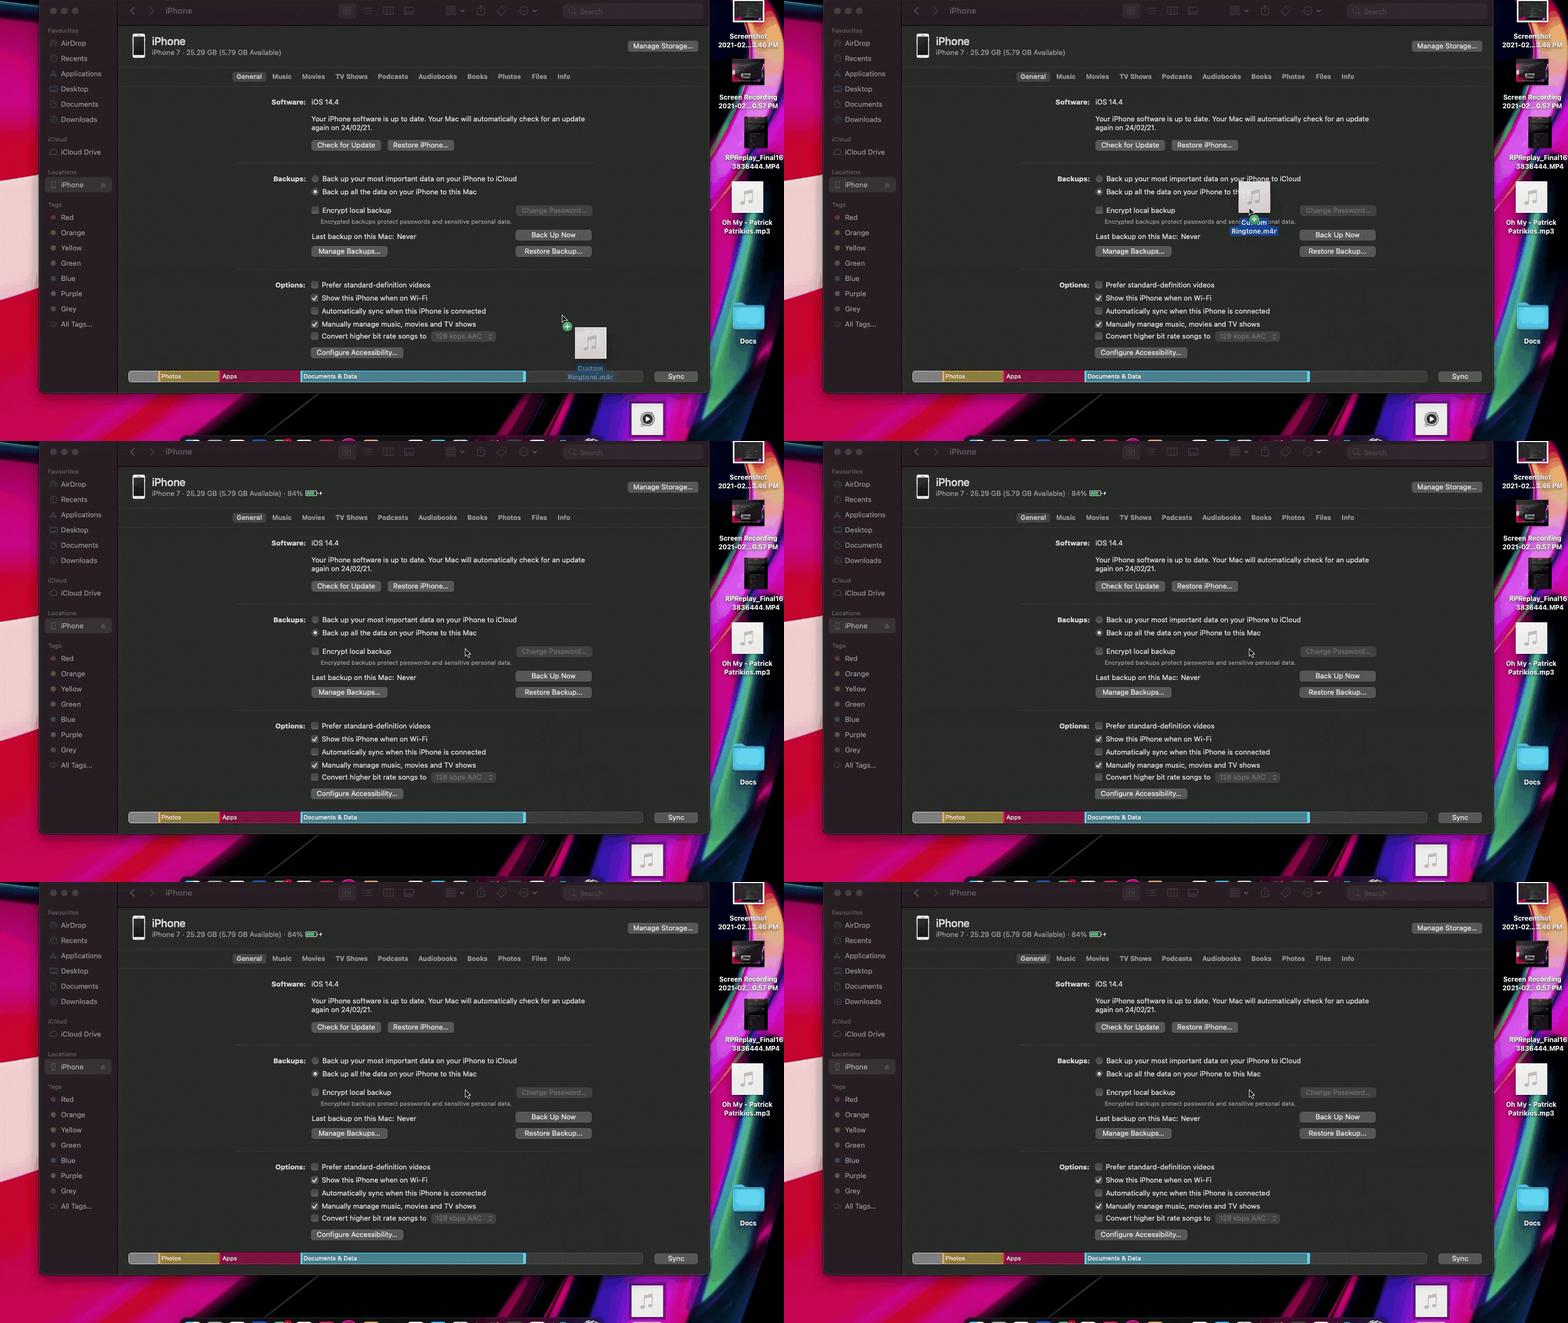
Now click on the iPhone from the finder and drop the ringtone on it. Then your Mac will sync the ringtone and on the bottom, you will see a progress bar.
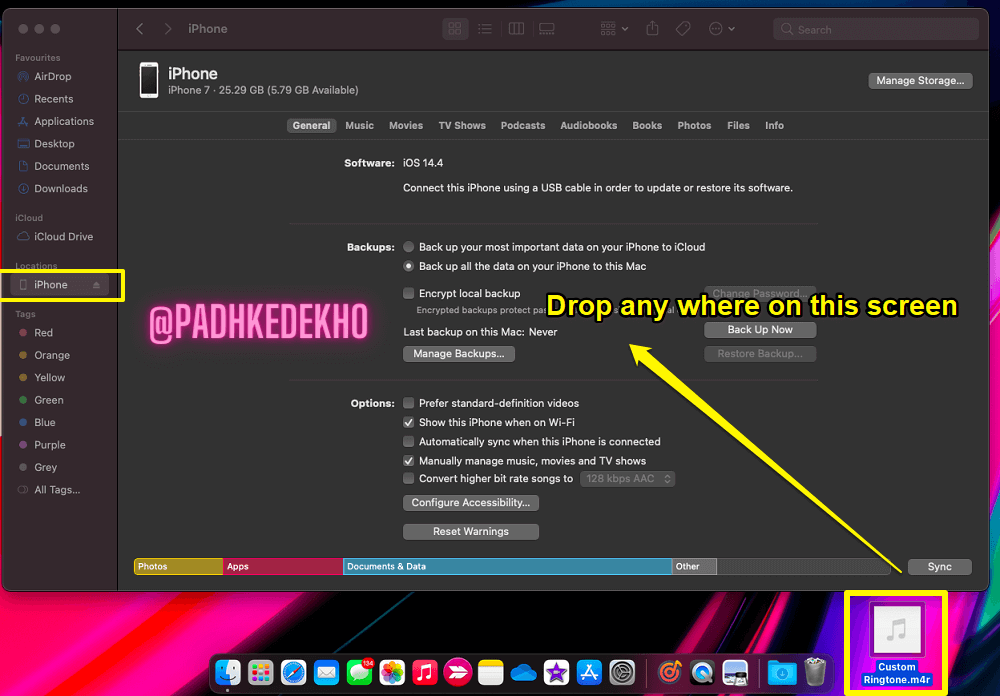
Once the progress bar completes, that’s the indication of a successful ringtone transfer.
To confirm whether the ringtone has been synched or not. Switch to iPhone and head to Settings -> Sounds and Haptics -> Ringtone.

and voila! Here’s your custom ringtone on your iPhone without using iTunes or GarageBand and that too for free!
Also Read: Easily Transfer Date From iPhone To Mac
Want To Set Your Audio Recording As a Ringtone?
If that’s the case, you’ll love this app even more. With Quick Ringtone Maker, you can use your audio recordings as ringtones and share them with friends!
Unfortunately, the free version will not let you record your audio. But who needs an audio recorder when you already have a Voice Memos app on your iPhone & Mac?
Using your audio is 100% the same as the above ringtone-making steps. You can select your favorite portion, modify volume, or even drop in fade and fade out for best results.
Would you like to know a trick that will help you record better audio on your iPhone?
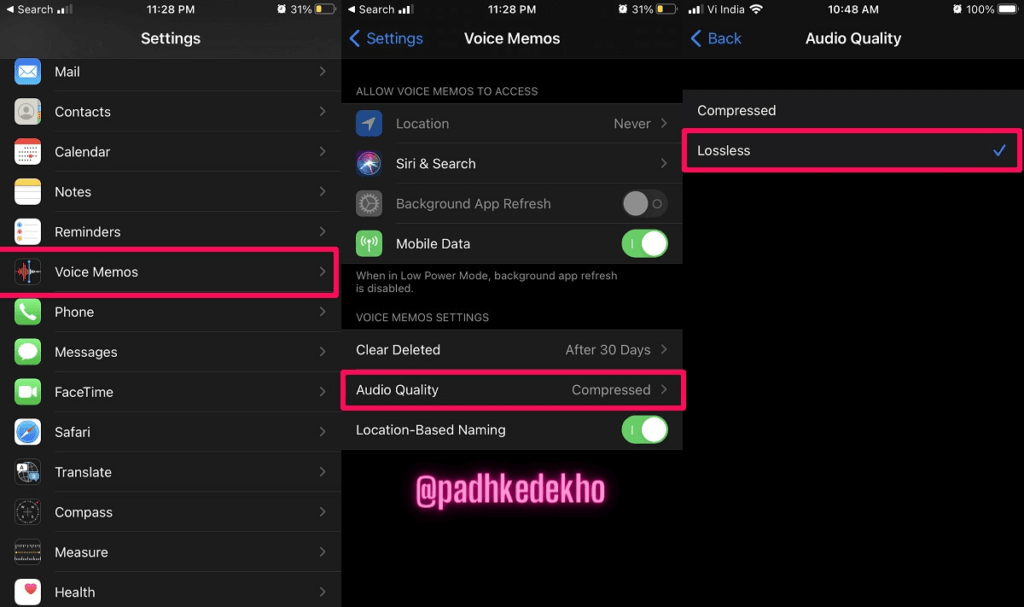
If you use Voice memos you should change the audio setting from “Compressed” to “Lossless”. In this way, you will experience quite a better audio recording.
To do so, open Settings on your iPhone. Then head over to Voice Memos. Tap on Audio Quality, and select Lossless instead of Compressed.
That’s it for now guys!
I hope you have found our way of making custom ringtones on Mac helpful. Do give us some inspiration by sharing this post with your friends! Comment if you are facing any issues or just want to say Hi :)!
Do you have doubts or queries? Connect us via social accounts. We would love to help you out! Thanks for reading guys!
Just like the above article, we share our 2 cents in the form of reviews, tips & tricks, comparisons and opinions so do check out those articles. And if you liked the content do share it with your friends and family! Thanks, we will see you at the next one!