You can transfer data from iPhone to Mac in various ways. Some methods involve a cable connection and a few truly wireless options are available. Like us do you also believe in a truly wireless data transfer but don’t know how to do that in the Apple ecosystem?
Don’t worry we have kept you covered and in this article, we will share everything that is relevant to understanding transferring data from iPhone to Mac Catalina, or Big Sur, and vice versa.
So without wasting your time, welcome to PadhkeDekho, and let’s dive into the available options.
If you prefer to watch it, then you can check this video.
Transfer Files From iPhone/iPad To Mac Popular Methods
#1 iPhone To Mac File Transfer Using iTunes
You have various options to achieve your tasks. Transfer data from iPhone to Mac by using iTunes. In this approach, if you are connected via lightning port then you’ll not require any wifi/cellular data to transfer files however you’ll need internet if are connecting wirelessly.
In both ways, it will take time to sync your iPhone Or iPad depending upon the number of files and their size.

#2 Using Cloud-Based Services For File Transfer
You can transfer data from iPhone to Mac by using iCloud Drive. With this method, you can upload your photos and videos with the help of Wi-Fi. Various other cloud-based services are available like One Drive, Dropbox, Google Drive, etc.
For those cloud-based services, you will be required to have a valid account and tons of internet data to upload the files. Uploading files on cloud storage consumes data and precious time so you’ll need to be patient to complete your task.
Also, the free cloud storage is limited so if you have large files in gigabytes then it will cost you financially.
So, if are you looking for the quickest method to transfer files that even don’t consume the internet then you can use AirDrop! Let’s look at Airdrop in detail.
iPhone To Mac File Transfer Using AirDrop
The AirDrop was introduced by Apple in Mac OS X Lion (Mac OS X 10.7) and iOS 7. The primary motive was allowing users to transfer heavy files within minutes and wirelessly. You can also say that Airdrop is a perfect example of truly wireless data transfer!
AirDrop is our favorite method for transferring data. It reduces the dependency on transferring data from iPhone to Mac without iTunes. Because AirDrop is speedier than iTunes and doesn’t require a lighting cable you can seamlessly transfer your recent photos and videos wirelessly.
Within a few seconds, you will have a copy of the transferred data on your Mac from your iOS device. The best part is that you can also share photos and videos from macOS to iOS and macOS to macOS which we will explain below.
When we tried AirDrop for the first time we were speechless because, within a few seconds, a file (1.2 GB) got transferred to our MacBook Air within 10 seconds which was way faster than considering cloud storage and even iTunes.
Since then, we shared files via AirDrop. For the first-time user, it might feel complicated but it’s not (trust me!). Let me explain what settings you’ll need to properly use AirDrop.
Prerequisite for using AirDrop on your iOS device
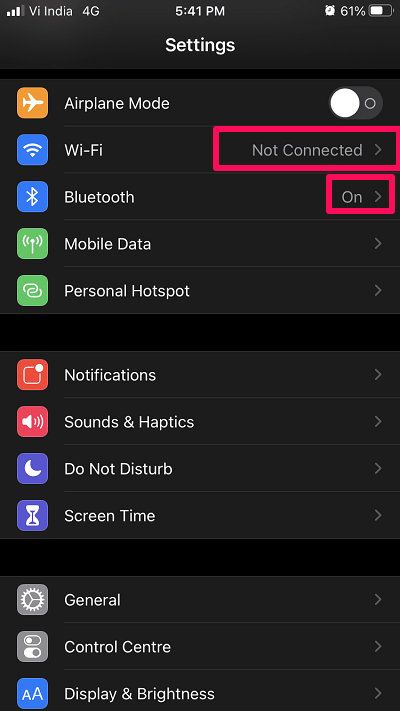
On your iPhone or iPad, turn on Bluetooth and Wi-Fi. Connection to any device is not required you just need to enable them.
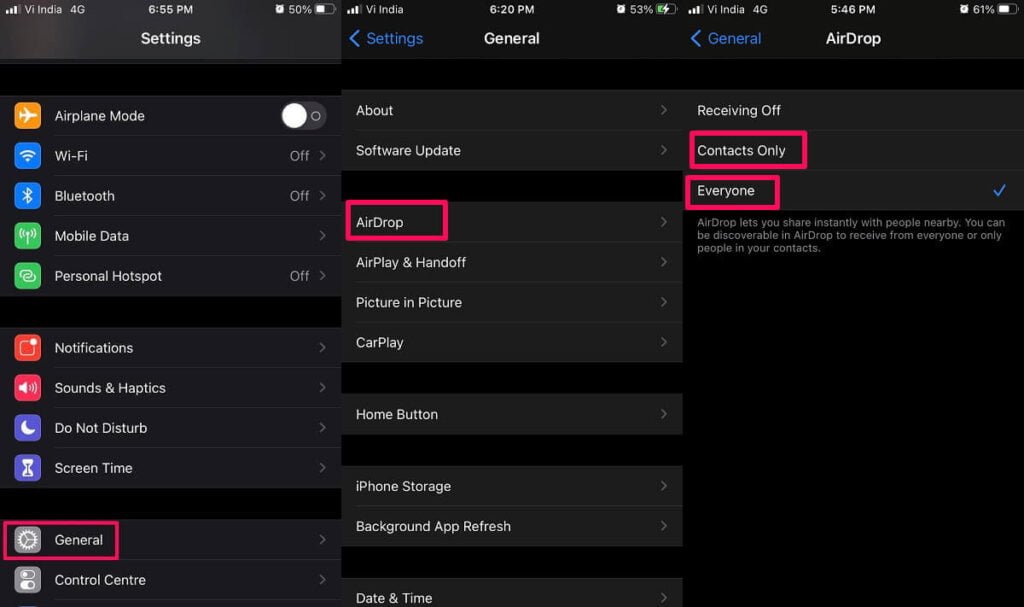
In the next step, go to Settings and navigate to General. Under General, you’ll find AirDrop tap on it and make sure either Everyone or Contacts Only is selected.
Let’s check the settings on macOS.
Prerequisite for using AirDrop on macOS
Just like on your iOS device, you’ll need to enable both Bluetooth and Wi-Fi. Connection to any device is not required. If you have a Bluetooth keyboard and mouse connected don’t worry it will cause no effect on the file transfer.
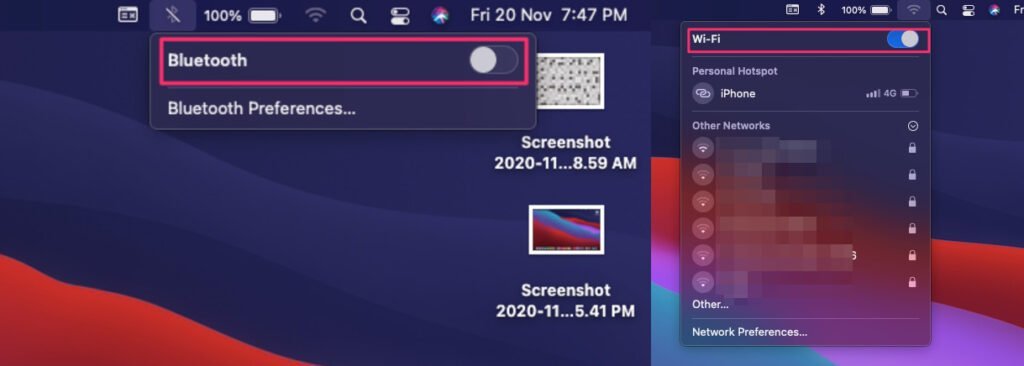
Once Bluetooth and Wi-Fi are turned on, leave your Mac device idle and switch over to your iOS device.
Transfer Data From iPhone To Mac Using AirDrop
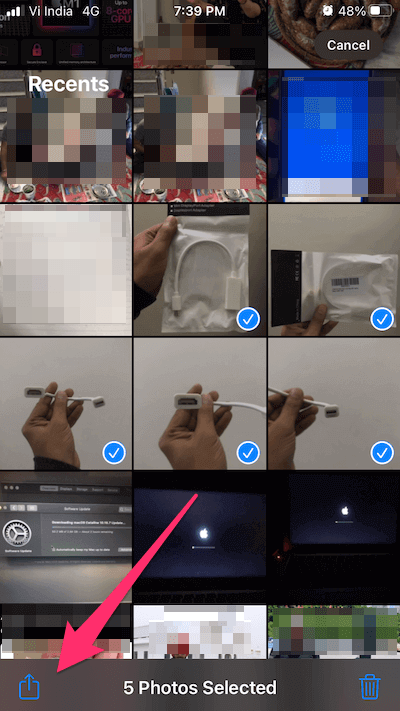
Select the photos and videos you want to transfer from your iPhone or iPad. You can even select all the photos and videos from your iPhone library! After making your selection, tap on the share icon (pointed below)
After pressing the share icon select the AirDrop icon from the list of available options.
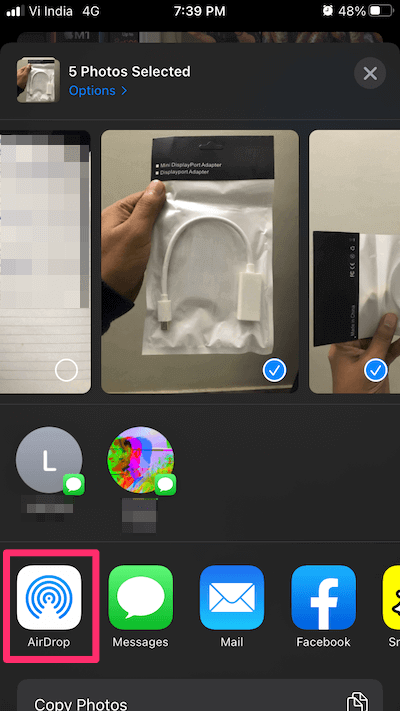
Tapping on AirDrop will open the AirDrop panel. There you’ll see all the available Apple products within the range with which you can share the data. That’s right, you can not only copy the data to a Mac but also to an iPhone! If your device isn’t on the list then, cross-check the Bluetooth and Wi-Fi settings on both devices.

Once you see the desired target device on the list, tap on it. You will hear a sound from the target device upon a successful connection. Afterward, file transfer will begin instantly.

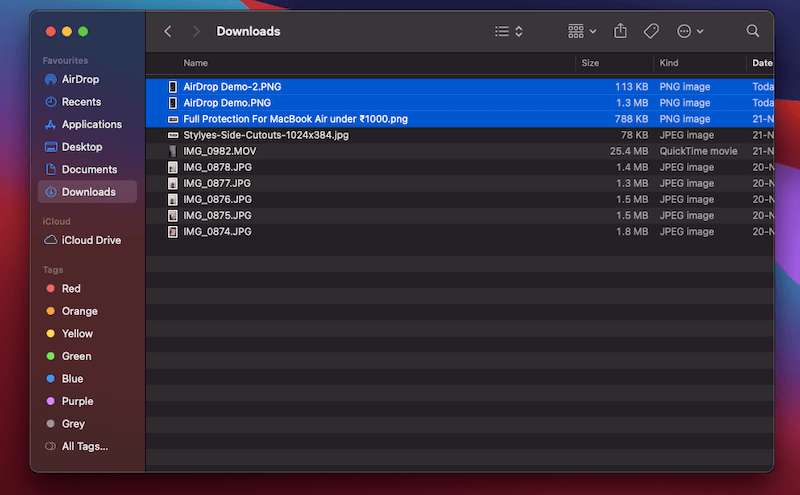
Voila! The selected files are now available in the Downloads folder on your Mac! Just like that within seconds and without using any 3rd part software. Now let’s check out how to transfer photos and videos from Mac to iPhone.
Transfer Files From Mac To iPhone Using AirDrop
Unlike iOS, on Mac, you get multiple ways of sharing files from Mac to iPhone via AirDrop. Some of the easiest methods are:-
#1 The Old School Guy
In this method, you copy the files to the desktop and then perform a few sets of commands mentioned below. In this approach, the probability of selecting something which is not required is negligible. So to use this method you’ll need to copy the required files on the desktop.

Right-click on any of the files (double tap on the trackpad if you’re not using any external mouse) Tap on Share and select AirDrop from the options.

On the next screen, the AirDrop panel will open. From there you will need to select the iOS or Mac device. Tapping on the profile photo or the account name will begin the transfer.

After selecting the device, you will hear a tone on the target device confirming the initializing transfer. if you have transferred files to a Mac then you’ll find those in the Downloads folder on the Mac. Photos and videos shared to an iOS device will be available in the Photos app on iOS devices.

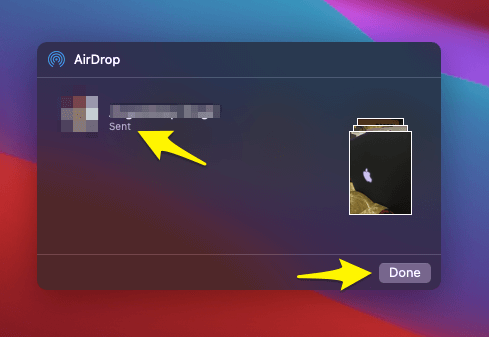
On the Mac, you’ll get a popup like this. Tap on Done to close the AirDrop dialog box.
#2 The Drag and Dropper
If you are a drag-and-drop kind of user then you’ll enjoy this approach. Just the way we did on iOS, select the n number of files you want to transfer to an iPhone from your Mac.
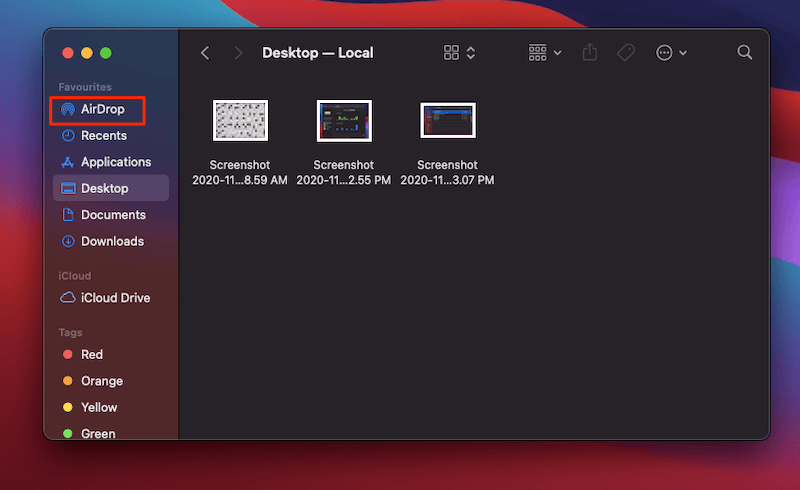
Once you have selected the files click on AirDrop under Favourites on the Finder.
It will open the AirDrop panel. Here you’ll see the list of nearby Apple devices. Don’t click on any profile just remember their location on the map.

Now open the folder where you have the desired files. Select the files and drag-drop them on the target AirDrop device.
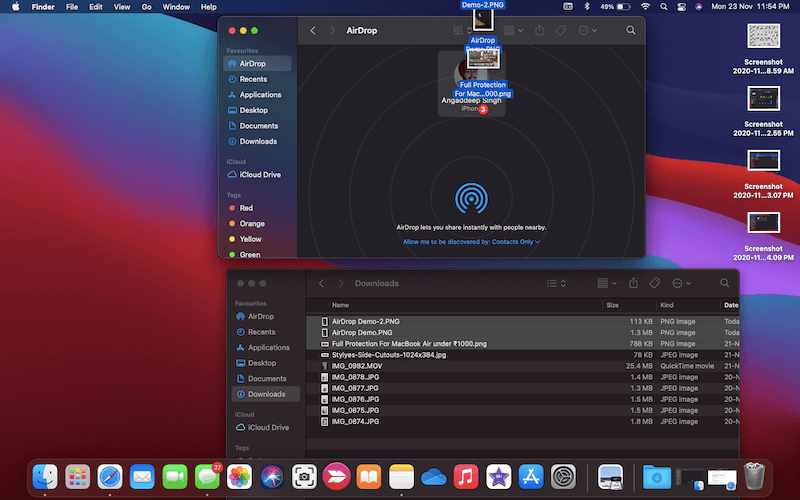
Within seconds, the shared media will be available on the iPhone or iPad!
How Does AirDrop Works?
AirDrop transfers files between devices using an ad-hoc network. In layman’s terms, your Apple device will form a small network that is under 40 feet (13 meters). If you are planning to AirDrop files between devices at your home then don’t worry your files are safe.
But you should keep AirDrop settings to Contacts Only if you are going to share files in public places. To change the AirDrop settings on your iPhone, go to Settings and navigate to General. Under General, you’ll find AirDrop tap on it and make sure Contacts Only is selected.
On Mac, in Finder, you’ll find AirDrop in the Favourites. From there you can change the settings to Contacts Only.
Should You Use AirDrop?
The most important thing is time. and if you value it then AirDrop is a blessing! Transferring data from iPad to Mac using AirDrop is quite seamless. if you are a photographer or video creator then AirDrop can help you in saving time without consuming any precious internet data of yours while on the move.
But you have to be careful about a few things. As AirDrop forms a public network by using Wi-Fi and Bluetooth then all the iPhones or Macs within the range can be intercepted. So before transferring the data as a precaution change the AirDrop settings to Contacts Only. Along with that, when you are done sharing files disable Bluetooth and WI-FI when not using it.
So there you go, guys!
I hope we were detailed enough to explain how to transfer files from iPhone to Mac via AirDrop and viz-a-viz. If you have any concerns then don’t hesitate and drop us a comment below. Perhaps, you can reach us on our social handles Twitter, Instagram, and Facebook.
FAQ
Q: How to transfer data from iPhone to iMac?
A: If your iPhone and iMac are running iOS 7 (or above ) and Mac OS X Lion (Mac OS X 10.7) or above then you can take advantage of AirDrop which is explained in this article.
Q: How can I transfer files from iPhone to Mac?
A: You can transfer files by using iTunes, iCloud, and even AirDrop which we have explained in this article.
Q: How to transfer videos from iPhone to Mac without cable?
A: For a wireless connection, you can use iCloud or AirDrop (recommend). All you need to know is here.
Q: How to transfer photos from Mac to Mac wirelessly?
A: The best way is by using AirDrop as it will be quick with no internet requirement. If you don’t know how to AirDrop then click on this link.
Q: How does AirDrop works?
A: AirDrop forms an ad-hoc local area network in which you can share files between Apple iPhone, iPad, iPod, MacBook, iMac, etc. wirelessly and instantly!
Q: How do you use AirDrop?
A: AirDrop lets you share files between Apple products in a close-range network using Bluetooth and WI-FI.
Q: How do I AirDrop photos from iPhone to iPhone?
A: By using AirDrop you can share photos and even videos from iPhone to iPhone.
Hey there!
Just like the above article, at PadhKeDekho we share our 2 cents in the form of reviews, tips & tricks, so do check out those articles. And if you liked our content do share it with your friends and family! Thanks, we will see you at the next one!
Best info ever !
Comments are closed.